

How To Fix A Computer In Automatic Repair Loop Windows 8
Summary :

Have your Windows Automatic Repair always stopped working? How to fix it and recover the lost data when Windows cannot load correctly? In this post, I will show several to fix Windows Automated Repair not working issue, as well as how to recover data via MiniTool data recovery apace and easily.
Quick Navigation :
- Windows Automated Repair Not Working
- Part 1. FIX: Automatic Repair Windows Couldn't Load Correctly in Windows 10/8
- Function 2. FIX: Windows 10/8 Automated Repair Couldn't Repair Your PC
- Bottom Line
- Windows x Startup Repair Not Working FAQ
- User Comments
Windows Automated Repair Not Working
Windows system similar Windows viii and Windows 10 includes a recovery characteristic called Automatic Repair. When operating system fails to boot, Windows Automatic Repair option will try to repair Windows. However, it has some limitations and doesn't always work, like any other plan.
There are two most common cases for the Windows Automatic Repair not working issue based on user feedback:
Windows couldn't load correctly.
Automatic Repair couldn't repair your PC.
Now, this article walks you lot through the 2 errors one by i.
Function 1. Fix: Automatic Repair Windows Couldn't Load Correctly in Windows 10/8
Have you ever encountered the Windows Automated Repair fails to work upshot? If nosotros google "Windows couldn't load correctly" or visit some professional forums similar Windows forum and Windows seven forum, we find many users are talking almost this error.

There are many reasons that can crusade this fault. For case:
- File organisation integrity may become corrupt or damaged. (That happens even more oftentimes if i turns off a PC while it is in the middle of writing crucial information to the boot sector.)
- Boot Configuration Data (BCD) is missing or corrupt. (This could happen because of disk write errors, ability outages, boot sector viruses, or errors made while configuring the BCD manually.)
How to set up this issue? If your Windows Automatic Repair fails to work considering of the Windows couldn't load correctly error, you lot can try the following solutions.
Way one. Restore PC to a Normal System Land by Using System Restore Function
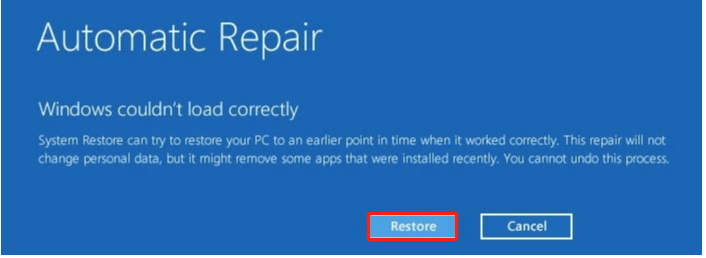
Generally speaking, the easiest and most effective style to set Windows Automated Repair not working outcome is to click Restore push button when you lot see the Windows couldn't load correctly mistake.
Automated Repair
Windows couldn't load correctly
Organization Restore can try to restore your PC to an earlier point in time when it worked correctly. This repair volition non change personal data, only information technology might remove some apps that were installed recently. Y'all cannot undo this process. Restore | Cancel
And so, Windows starts to revert to a previous organization country and reboot. Finally, you lot have just one more than thing to practice: recover removed information files afterward arrangement restore!
At present, you might exist wondering:
"How to recover moved files after system restore?"
At present, you tin try MiniTool Power Data Recovery to cheque whether it can find your lost data. Yous tin download it on your figurer by pressing the following push.
Free Download
Fisrt, you need to launch this software and enter its interface.
Second, select the target bulldoze you want to recover and then click the Scan button, or you tin can click Devices tab and select the whole disk to browse.
Or you tin click Scan Settings button in the left panel to specify needed file systems too every bit file types before scanning.
Tip:While scanning, yous can click the Stop push to stop the scan process one time you have found all your data that needed to exist recovered. However, to go best recovery consequence, you had better expect patiently until the browse is completed, and the scanning time is determined by the capacity of data.
Finally, preview files, check needed files, and then click Salvage button to store them on a prophylactic place.

Annotation: while saving data, yous might receive a warning: Y'all have reached the file saving limit for the selected files, as shown beneath.
With this trial edition, yous tin only scan your files on the computer. To break the limitation, you need to upgrade your copy of MiniTool Ability Data Recovery. You tin read this post "Compare License Type" to know which license type is the best for you.
Style 2. Run Chkdsk Control to Set up Hard disk drive & File System Bug
Sometimes, users are still stuck in startup repair infinite loop after using System Restore function. In that case, they can try running chkdsk to troubleshoot the Windows couldn't load correctly error, as shown in the following steps.
Step ane: Insert the Windows bootable drive to your figurer and boot from it.
Stride ii: Select your linguistic communication preferences, and click Next.

Pace iii: Click Repair your computer.

Step 4: Choose Troubleshoot.

Step v: Click Control Prompt.
Pace 6: Type chkdsk /r and press Enter.

Pace 7: Type leave and printing Enter.
Footstep eight: Restart your computer and run into if the Windows couldn't load correctly error disappeared.
Way three. Run Bootrec Control to Rebuild Windows BCD
If y'all are still stuck in Automated Repair with Windows couldn't load correctly error later on trying the above 2 solutions, you can try rebuilding Windows' BCD.
Step 1: Insert the Windows bootable drive and boot from information technology.
Step ii: Click Repair your computer > Troubleshoot > Advanced Options > Control Prompt.
Pace 3: Type bootrec /fixmbr and printing Enter.
Step 4: Type bootrec /fixboot and press Enter.
Footstep 5: Type bootrec /rebuildbcd and press Enter.

Stride v: Restart your computer and see if the Windows automatic repair not working issue persists.
Role 2. Set up: Windows 10/eight Automatic Repair Couldn't Repair Your PC
Let's showtime with a true example from answers.microsoft.com:
Q: Automatic Repair couldn't repair your PC
I've tried every option in the kicking options carte du jour and cannot get Windows 8 to boot. I simply get 'Automatic Repair couldn't repair your PC." And afterward: "Log file: D:\Windows\System32\Logfiles\Srt\SrtTrail.txt" with the Shutdown and Avant-garde options button, which just takes me to the boot options screen.
I have no install media as this is originally a Win7 machine for which I downloaded Windows 8.

Generally speaking, if your Windows Automatic Repair fails to work considering of the Automatic Repair couldn't repair your PC fault, you can try the following solutions to solve the problem.
Way 1. Repair mbr and Rebuild the BCD
As we know, once the MBR and Kick Configuration Data (BCD) are missing, corrupted or not properly configured, Windows won't exist able to start. Therefore, you tin try repairing MBR and rebuilding BCD to fix the Windows Automated Repair non working result.
1) Insert the Windows bootable drive and boot from it.
2) Select your language preferences, and click Next.
three) Subsequently selecting linguistic communication, printing Shift + F10 to open command prompt.
4) Type the following commands and printing Enter after each of them:
bootrec.exe /rebuildbcd
bootrec.exe /fixmbr
bootrec.exe /fixboot

Note: Some users suggest that you lot demand to run additional chkdsk command (chkdsk /f /r C: ) to solve the Windows Automatic Repair fails issue.
5) Type leave and printing Enter after completing each command successfully.
six) Restart your PC to run into if the Windows Automatic Repair couldn't repair your PC error disappeared.
Style two. Boot to Safe Mode and Run Control Prompt
Some users reported that the reason why Windows ten Automatic Repair couldn't repair your PC could exist a bad driver.acquired by a bad driver. And they try the post-obit solution to solve the Windows Automated Repair not working issue.
1. Cull Troubleshoot > Advanced options > Startup Settings.

2. Click Restart push, and your computer should now restart and give y'all a list of options
iii. Choose Enable Safe Manner with Networking.

four. Download updated version of the driver that's giving you trouble when Rubber Mode starts.
5. Printing Windows cardinal + X and choose Command Prompt (Admin) from the list.
6. Type DISM /Online /Cleanup-Image /RestoreHealth, and press Enter.

7. Restart your figurer.
viii. Install the commuter that you've downloaded and the Windows Automatic Repair fails to work event should be resolved.
Style iii. Disable Early Launch Anti-Malware Protection
Some users recommend disabling early launch anti-malware protection to set up the Windows 10 Automatic Repair couldn't repair your PC loop.
Choose Troubleshoot > Advanced Options > Startup Settings. After that, the computer should restart and then will give you a listing of options. Next, cull Disable early launch anti-malware protection. After that, restart your PC and check if the Windows Automatic Repair not working issue has been resolved.
Way 4. Delete the Problematic File
Sometimes, some sure files like VMW can crusade the Windows x/8 Automatic Repair couldn't repair your PC issue. Now, do the following to check the log files.
Open Command Prompt. (Please encounter Way i. Repair MBR and Rebuild the BCD to know how to open it.)
Type the post-obit command:
cd C:\Windows\System32\LogFiles\Srt
SrtTrail.txt
When the file opens you lot will come across this "Kick critical file c:\windows\system32\drivers\tmel.sys is corrupt."

Now, type the post-obit command in cmd to delete the problematic file.
cd c:\windows\system32\drivers
del vsock.sys

Note: You might need to navigate to a dissimilar folder and delete a dissimilar file in your case because the file can vary in dissimilar situations. Make sure the file you want to delete isn't a core Windows 10 file before deleting information technology. Or, you tin crusade harm to your operating organization.
Restart to see if the issue is fixed. If non, continue to the next method.
Style five. Disable Automatic Startup Repair
Sometimes, you merely need to disable Automatic Startup Repair when you are stuck in the loop of Windows x Automated Repair couldn't repair your PC.
ane. Open up Control Prompt, type the following command and printing Enter to run it:
bcdedit /gear up {default} recoveryenabled No

2. Type Exit and printing Enter.
three. Restart and Automatic Startup Repair should be disabled.
four. Type the following command in cmd if you need to once again enable information technology.
bcdedit /set {default} recoveryenabled Yes
5. Restart your calculator to apply changes.
Way six. Perform Refresh or Reset
If Windows Automated Repair loop issue still exists, you might have to try performing a Reset or Refresh to troubleshoot the Automated Repair couldn't repair your PC issue.
To perform Refresh or Reset, yous need to do the following:
In Windows Boot Options menu, cull Troubleshoot. Choose Rest your PC, or Refresh your PC. Follow the sorcerer pedagogy to consummate this process.

If you lot choose Refresh option, your installed applications will exist removed but your installed universal apps and settings will exist saved. If yous choose Reset selection, your information, files and apps volition be deleted. It is recommended to recover all your important files before taking this step.
MiniTool Power Data Recovery is recommended here. This professional data recovery software can help you effectively recover lost data. Besides, even if all solutions cannot help yous, you as well can try using this tool to get lost data back because it offers MiniTool Ability Data Recovery Bootable Edition to recover data when PC won't kicking.
Note: This trial edition doesn't offering MiniTool Bootable Media Builder. It is recommededd to choose the Personal or above edition to go it.
Now, let's encounter the detailed steps.
Launch MiniTool Ability Data Recovery in a normal computer, and and then click Bootable Media push button at the top toolbar to create bootable CD, DVD, or USB flash bulldoze.

Pinnacle recommendation: How to Build Kick CD/DVD Discs and Boot Flash Drive with Bootable Media Builder?
Connect the burned MiniTool Boot CD/DVD Disc to your PC with Windows Automated Repair loop effect.
Commencement the computer and enter BIOS.
Set the Bootable Disc as the 1st kicking device and press F10 to save configuration changes.
Click MiniTool Power Information Recovery in the main interface of MiniTool PE Loader interface.

Now, you volition come across the main interface of this professional data recovery software, and and then select target bulldoze and click Scan button.

Cheque all needed files and relieve them on a rubber place.

Thus, all work has been done.
Like these means?
Click to tweet
Lesser Line
Now you lot have probably learned everything about how to set Windows Automatic Repair when it is non working.
If yous still have whatsoever question regarding this Windows Automatic Repair loop, please feel gratis to write them in the comment section or send your e-mail to [e-mail protected].
Windows 10 Startup Repair Not Working FAQ
How practise yous fix Windows 10 when it fails to boot?
- Repair MBR and Rebuild the BCD
- Kick to Safe Way and Run Control Prompt
- Disable Early Launch Anti-Malware Protection
- Delete the Problematic File
- Disable Automatic Startup Repair
- Perform Refresh or Reset
How do I gear up the windows automatic repair loop?
- Restart PC.
- Restore Windows Registry.
- Delete the Problematic File.
- Disable Automated Startup Repair.
- Run Bootrec Command to Rebuild Windows BCD
- Restore system and data recovery
Why does my computer keep saying preparing automated repair?
Automatic Repair can fix some PC bug when the computer cannot boot properly. Sometimes, it repair starts and fails, and users will go stuck on fa black screen with "Preparing Automated Repair" or "Diagnosing your PC" error message. HP, Lenovo, Asus, Dell, and Acer users are the most common victims of this upshot - Laptop Stuck on Preparing Automatic Repair during Startup.
How practise I go out of the automatic repair loop?
- Perform a difficult reboot.
- Kick into safe mode.
- extend organisation reserved partition.
- Rebuild BCD.
- Disable Automatic Repair at Windows x boot.
- Reinstall Windows and recover lost information.

How To Fix A Computer In Automatic Repair Loop Windows 8,
Source: https://www.minitool.com/data-recovery/windows-automatic-repair-not-working.html
Posted by: broderickperney.blogspot.com
0 Response to "How To Fix A Computer In Automatic Repair Loop Windows 8"
Post a Comment